

The Gate, Step by Step
1
Submit
The author finishes the draft and submits it. The change moves to
Submitted and the matching approval rule determines who
must sign off and how many approvals are needed.
2
Review and decide
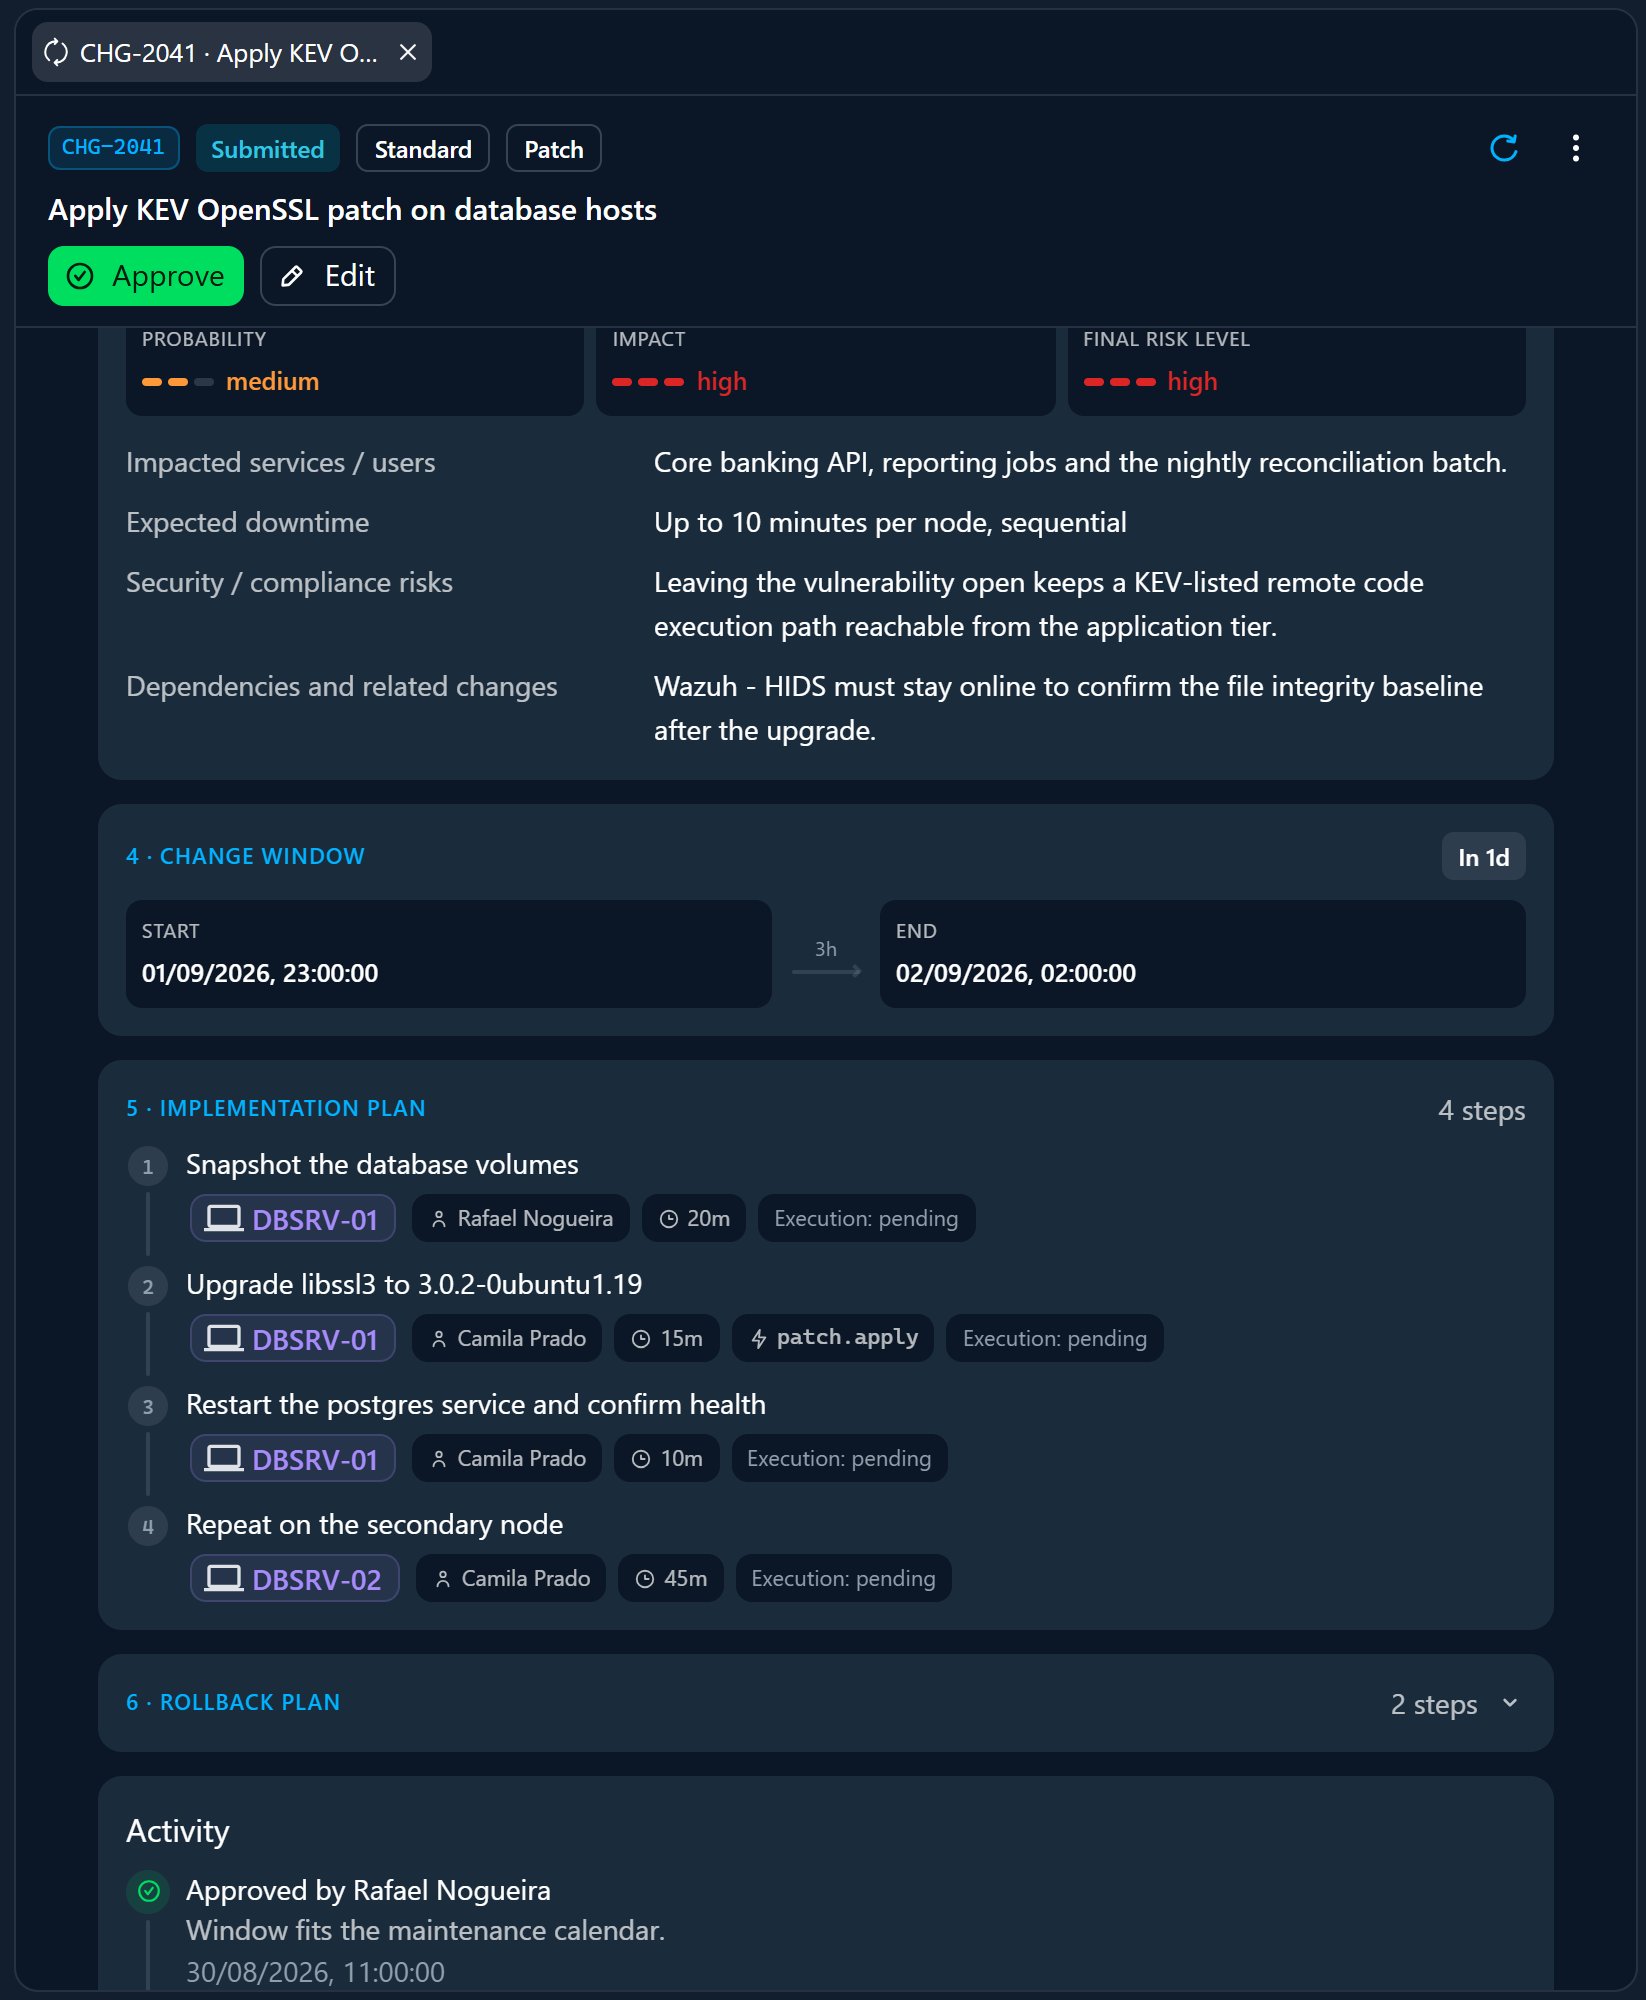
Approvers open the change, review the justification, risk, window, and plan,
and either Approve or Reject. The Approvals panel tracks progress
live — for example 2 of 3 — and shows which rule is in force.
3
Approved
Once the required number of approvals is reached, the change becomes
Approved and is ready to run.
4
Execute — the two paths
A standard change is started explicitly with Execute (Approved →
Executing), and the agents run the steps. An update patch needs no manual
trigger — it installs automatically inside its scheduled maintenance window.
5
Closed and audited
The change finishes as Completed (or Partial / Failed), and the whole
decision trail is recorded in its history.
Approving and rejecting
- Approve records your decision against your user. When the change reaches the required number of approvals, it advances automatically.
- Reject ends the approval flow — the change moves to Rejected. You can attach a reason so the author knows what to fix; they can then edit the change (which returns it to Draft) and resubmit.
Every approval and rejection is attributed to the user who made it, with a
timestamp, and appears in the change’s Activity history — so the record
answers “who approved this, and when?” on its own.
The Two Execution Paths
The approval gate is identical for both kinds of change; only what happens after approval differs.Standard change — you Execute
After approval, a person clicks Execute to start the change. This keeps a
human in control of when the work begins, even after sign-off. The agents
then run the implementation steps from the Workspace, and the rollback plan is
on hand if it’s needed.
Update patch — runs in the window
Approving a patch group authorizes the agent to install it in the next
maintenance window. There is no manual Execute — the rollout begins when the
window opens and progresses item by item. Approving is recorded under your user.
Approval Rules
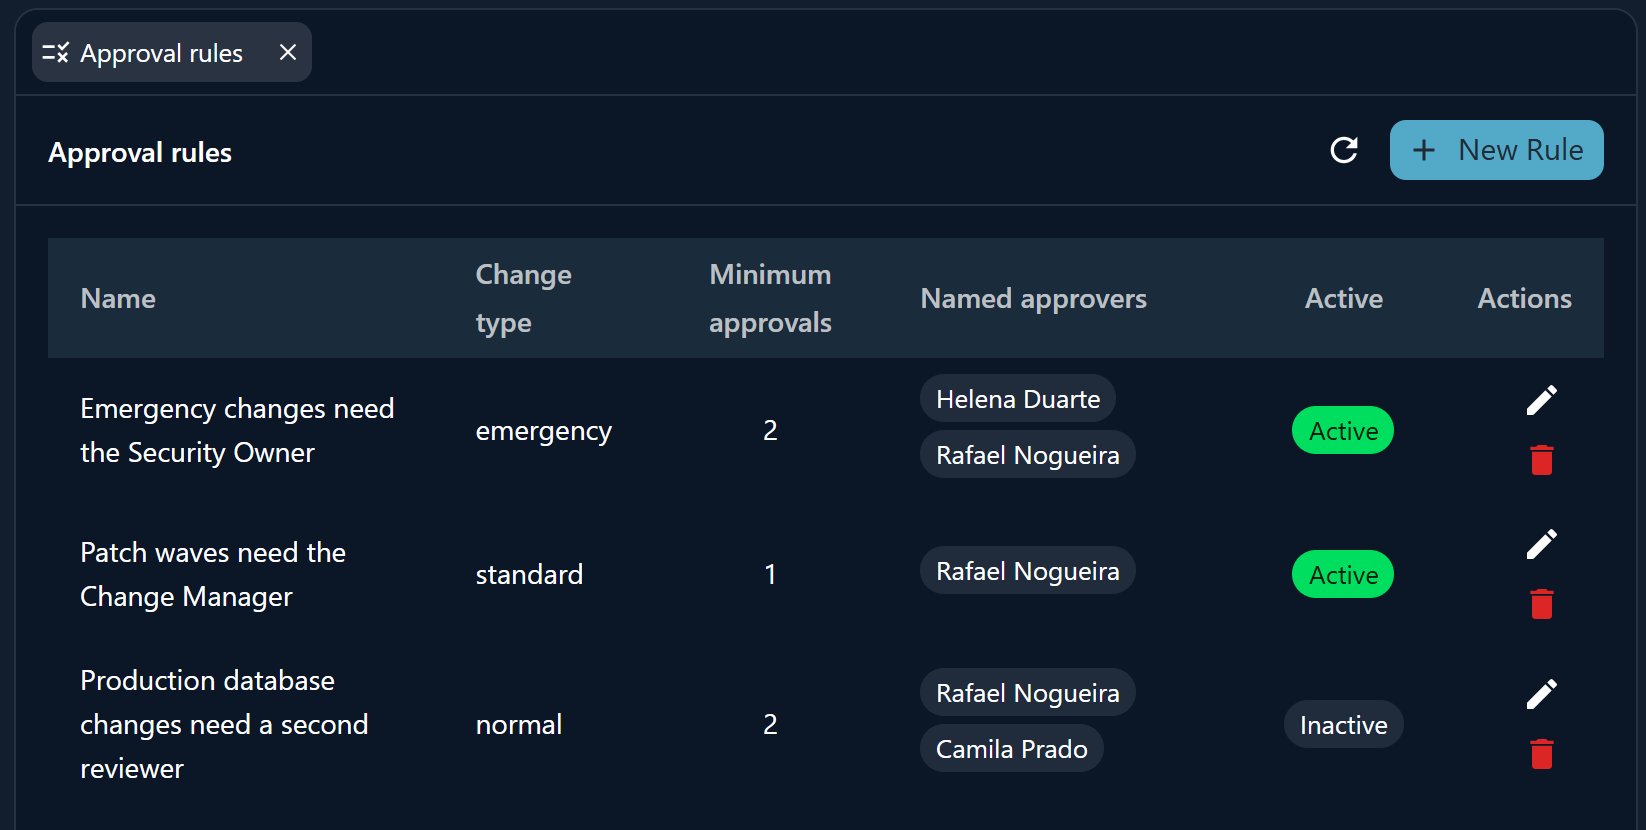
By default, a change needs one approval, and the requester may approve their own change. That’s fine for a small team, but most organizations want stronger governance. Approval rules let you define, per context, exactly who must approve which changes — a policy that’s evaluated automatically whenever a change is submitted. A rule is made of:
When a change is submitted, Myrmex finds the matching rule (by the change’s type, preferring a rule named for that type over a catch-all) and applies it. The Approvals panel then shows the rule in force and the progress toward its minimum — for example, min. 2.
Rules are a policy layer, not a bottleneck: if no rule matches a change, the
default applies — 1 approval, and the requester may approve. Removing a rule
simply falls its changes back to that default.
Managing rules
Open the Approval rules view from Change Management to create, edit, enable/disable, or delete rules. Managing rules is a governance action, separate from approving individual changes — it’s gated by thegmuds.admin permission.
Who Can Do What
Change Management is governed by a dedicated set of permissions, so you can separate the people who author changes from those who approve them and those who govern the rules:Related
Change Management overview
The module, the two kinds of change, and the full lifecycle.
Patch & Update Management
Consult pending updates and approve the patch schedules the AI proposes.